29 Mar 2012

Pungent Melanzane alla Parmigiana - Eggplant Parmesan is a dish from the gods!


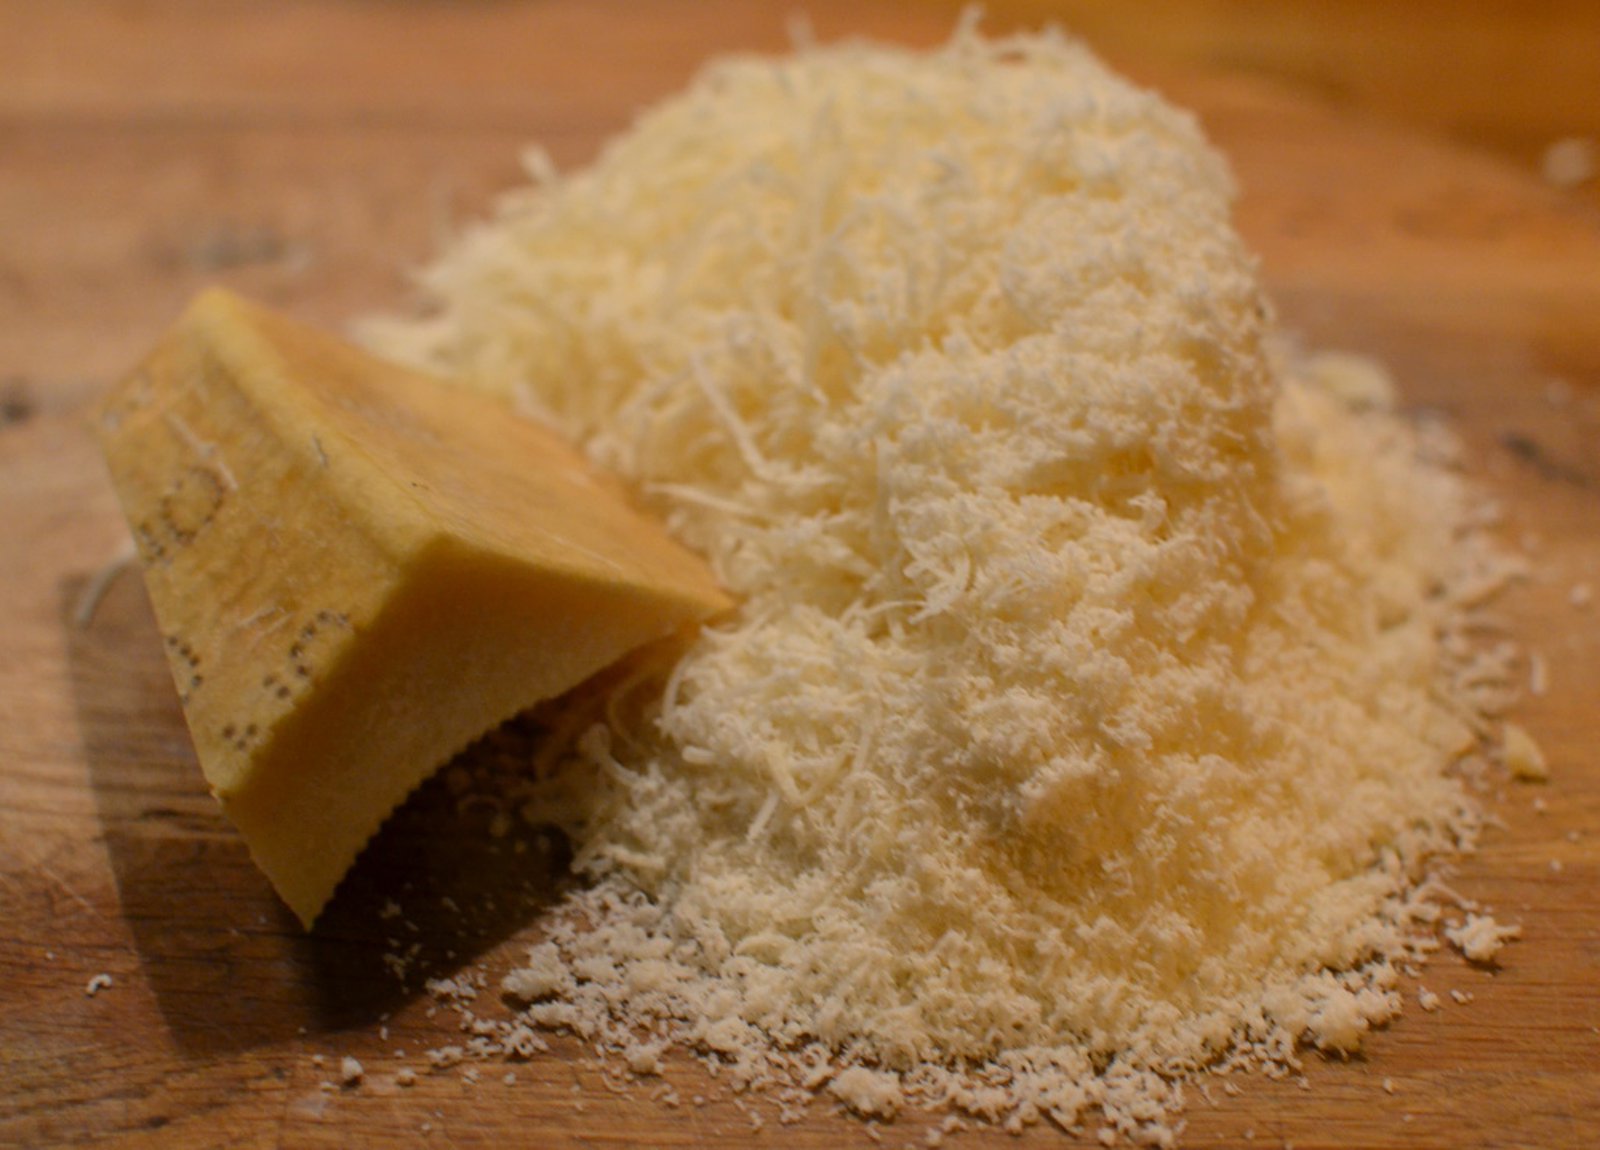
What would this dish be without heaps of parmigiano cheese?

This dish is a classic in Italian kitchens. It is known across Italy though in varying version depending on regions. As far as I can gather, the famous Italian chef Marcella Hazan was skeptical as to whether to include this recipe in her bible of Italian cooking - because it was so commonplace. But of course it eventually found its way onto the pages. I have come across this recipe a few times in other cook books but never really been all that intrigued to give it a go. How foolish one can be!

This was partly based on ignorance - I had at some point decided that eggplant wasn't tasty food - but now I know that the reason behind my misguided prejudice was that I simply didn't know how to cook it! You could say that eggplant (melanzane) is the new discovery in my kitchen. I have also blogged about penne with eggplant in tomato sauce which is fantastic in its simplicity. That dish we have repeated a few times with minor adjustments.

Fresh, uncooked eggplant does not taste good - it is quite bitter - but through cooking you can transform the flavor of this beautiful fruit and summon a wonderful, deep, aromatic and slightly hot flavor. You need to rigorously salt it before cooking it - allow it to sweat out all that bitterness. And eggplant loves a good soak in oil - in hot oil. Eggplant is like a sponge and absorbs a lot of the liquid, so instead of deep frying it, you can brush it with oil and bake/grill it in the oven, which is in all probability the healthier option. In this way you can extract that much sought after flavor!

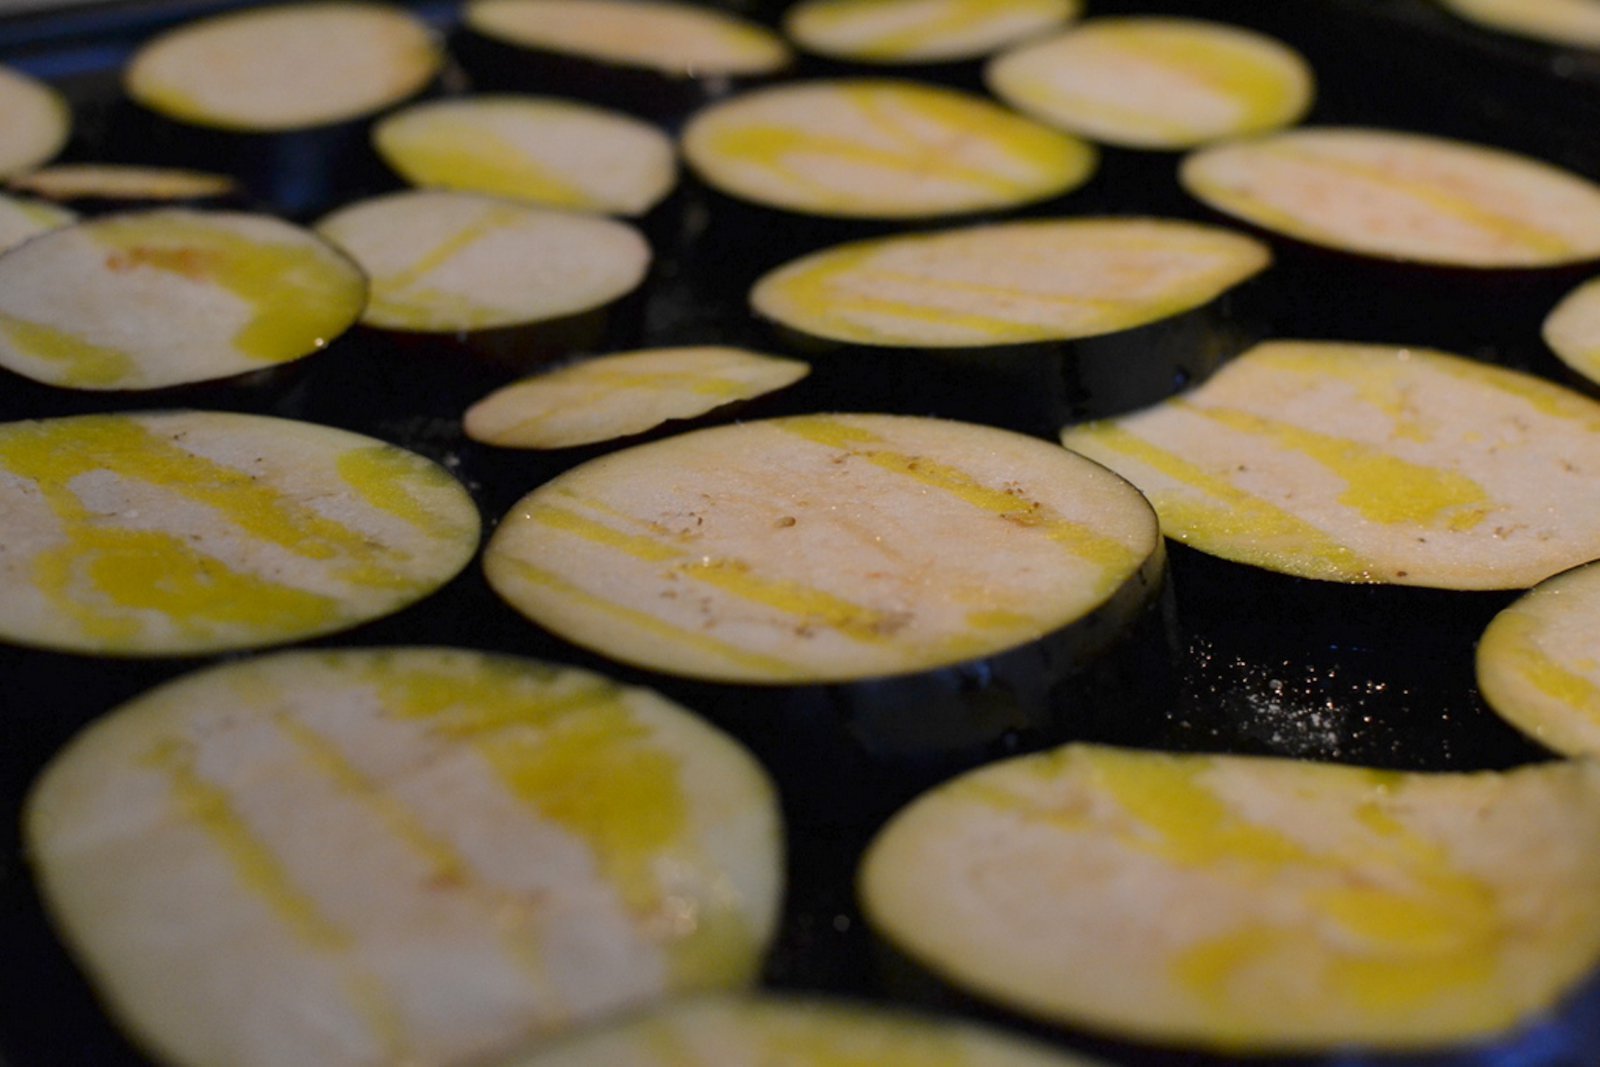
Seasoned and drizzled in oil before placing in a hot oven

Melanzane alla Parmigiana - Eggplant Parmesan with Garlic bread and Red Wine


This is an easy dish whose outcome relies on the use of high quality ingredients. We tried to make this a simple as possible. And even though the dish is called 'alla parmigian' we also used mozzarella. This was done not only for purposes of flavor, but also to save some cash - mozzarella is of course a whole lot less expensive than parmesan cheese.

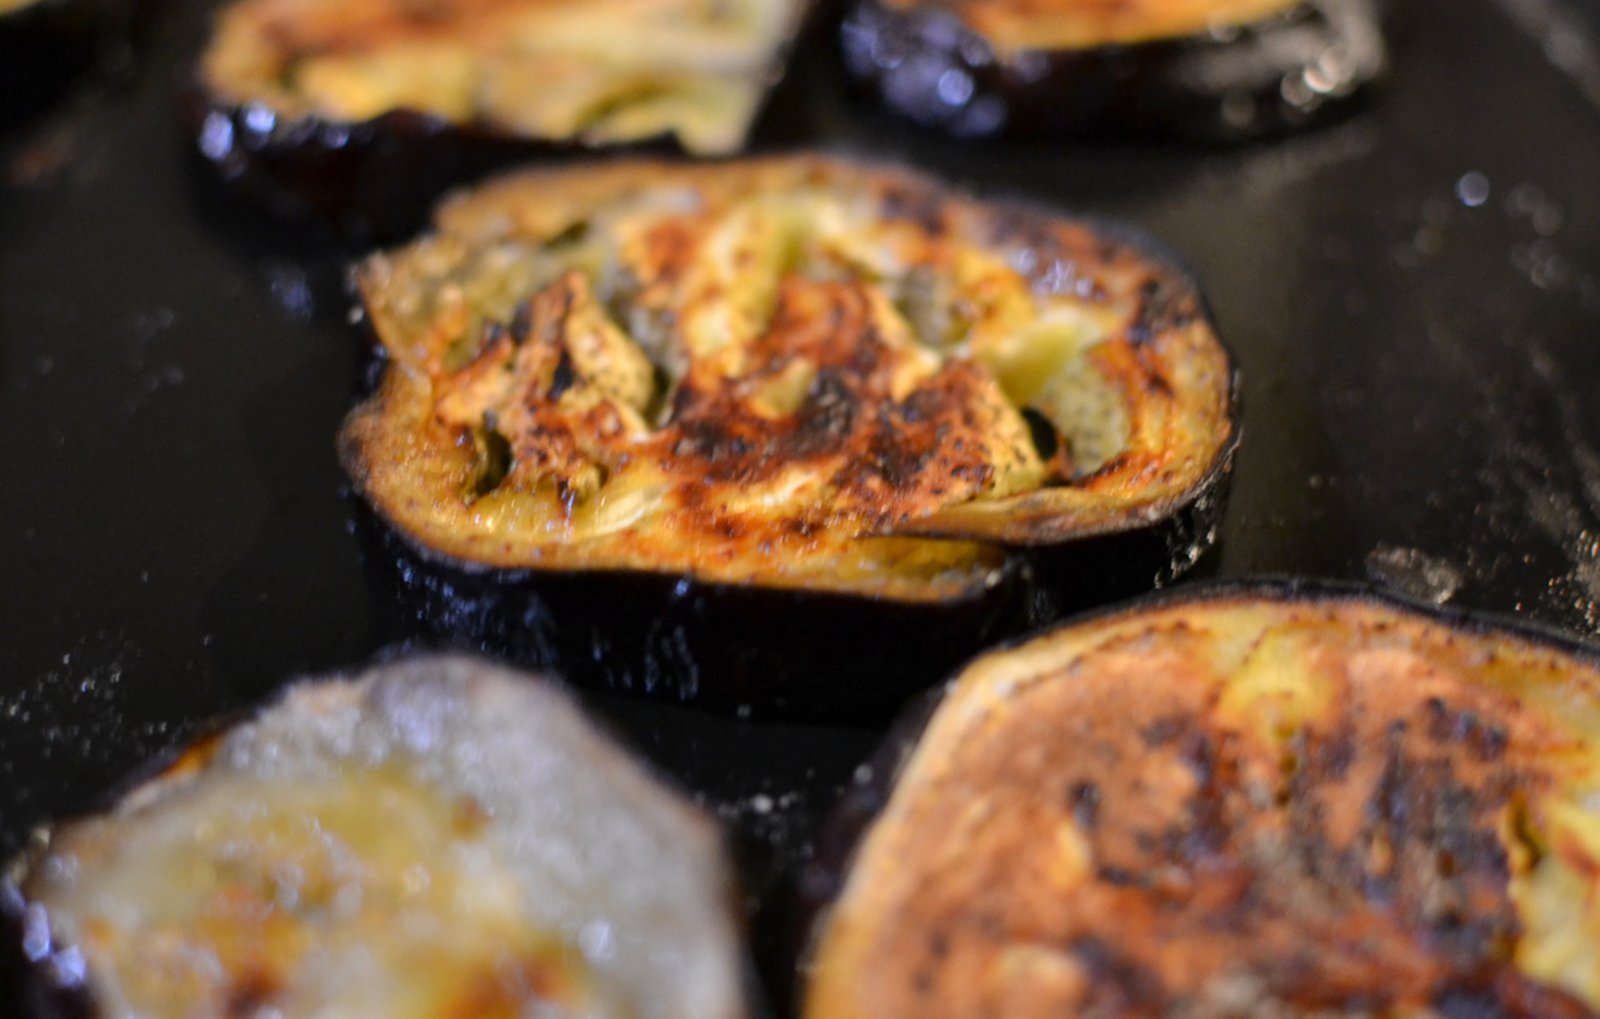
The now browned slices of eggplant have transformed in taste during cooking

First, prepare the eggplant. Slice 3-4 eggplants into slices, which are placed on paper towels and generously salted. Soon the eggplant will begin to sweat and bubbles of liquid will emerge on the surface, which the paper towel will absorb - make sure you salt both sides of the slice. This time we decided to cook the eggplant in the oven (deep frying it is reserved for novel occasions). It was brushed with extra virgin olive oil and baked in a 200 degree pre-heated oven until it began to take on a beautiful golden color. Remove from the oven and set aside.The eggplant is quite the resilient thing and can withstand a lot of cooking without effecting the flavor - so don't worry if it looks a bit charred - it will still taste fantastic.
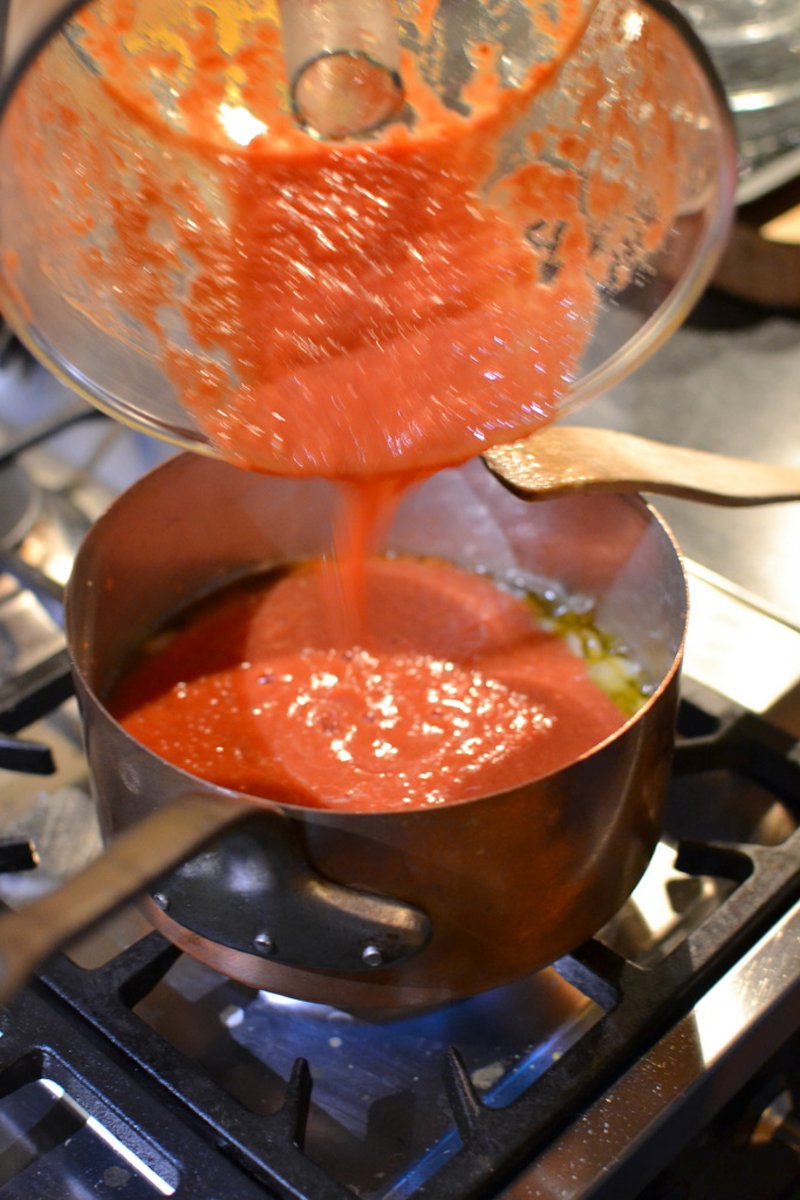
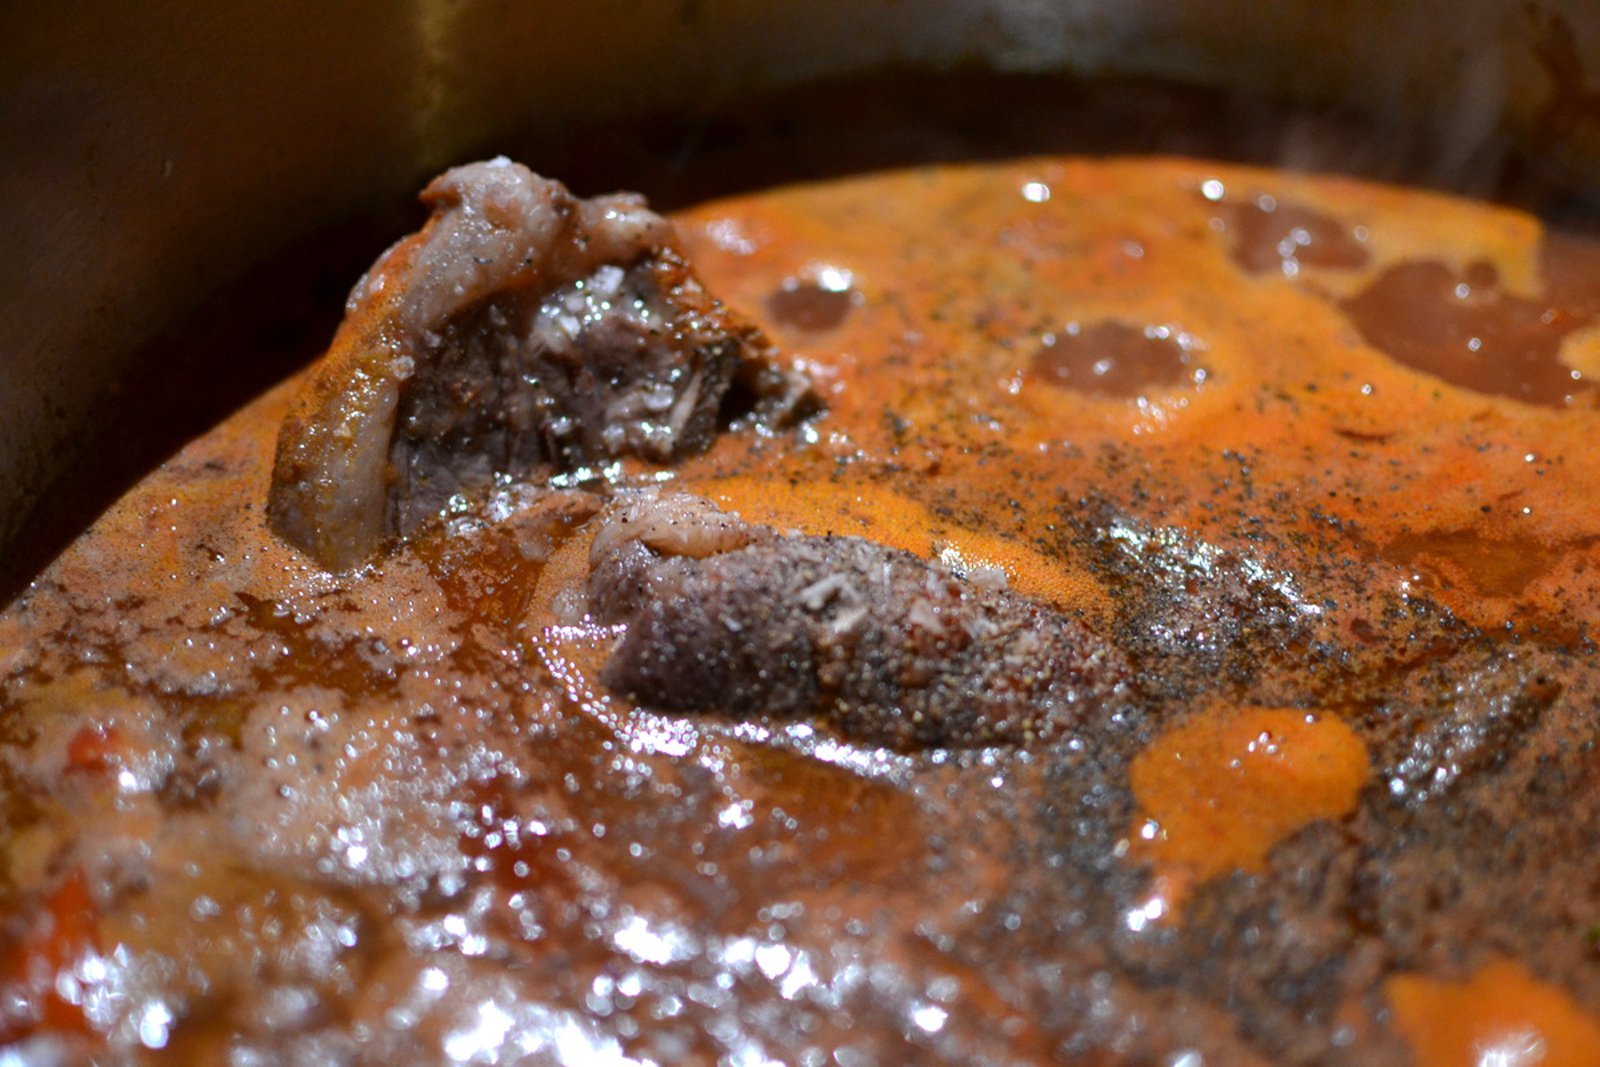
Heated on the stove

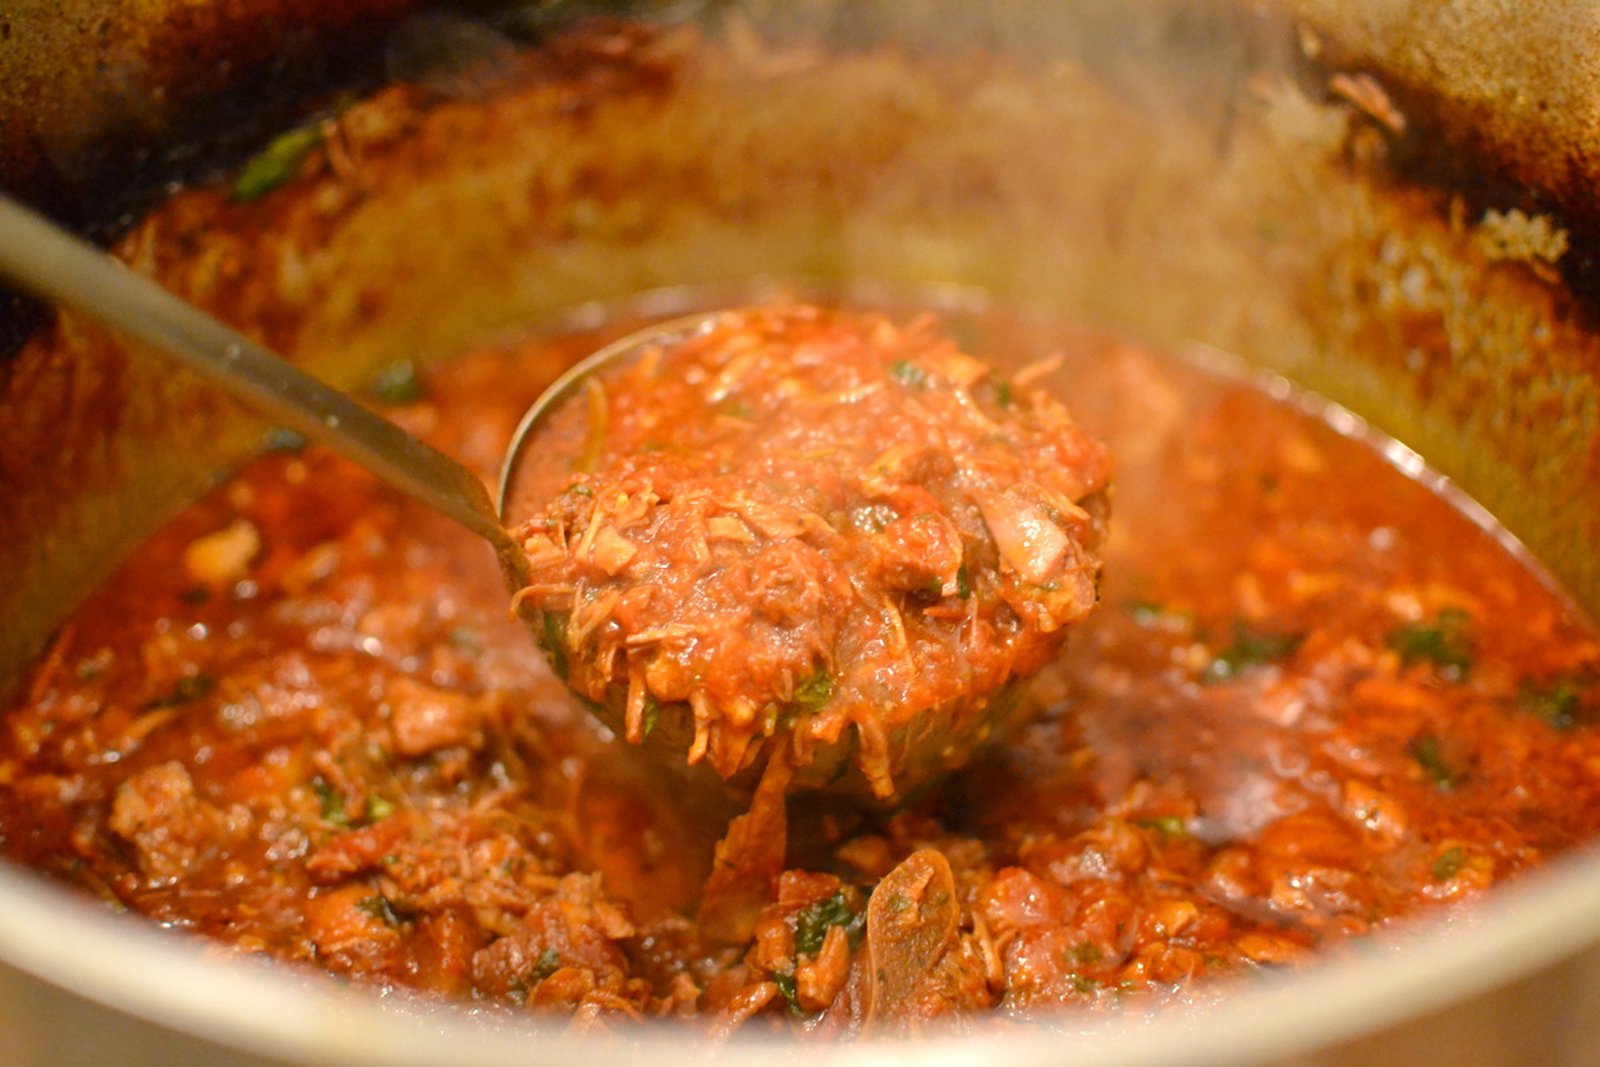
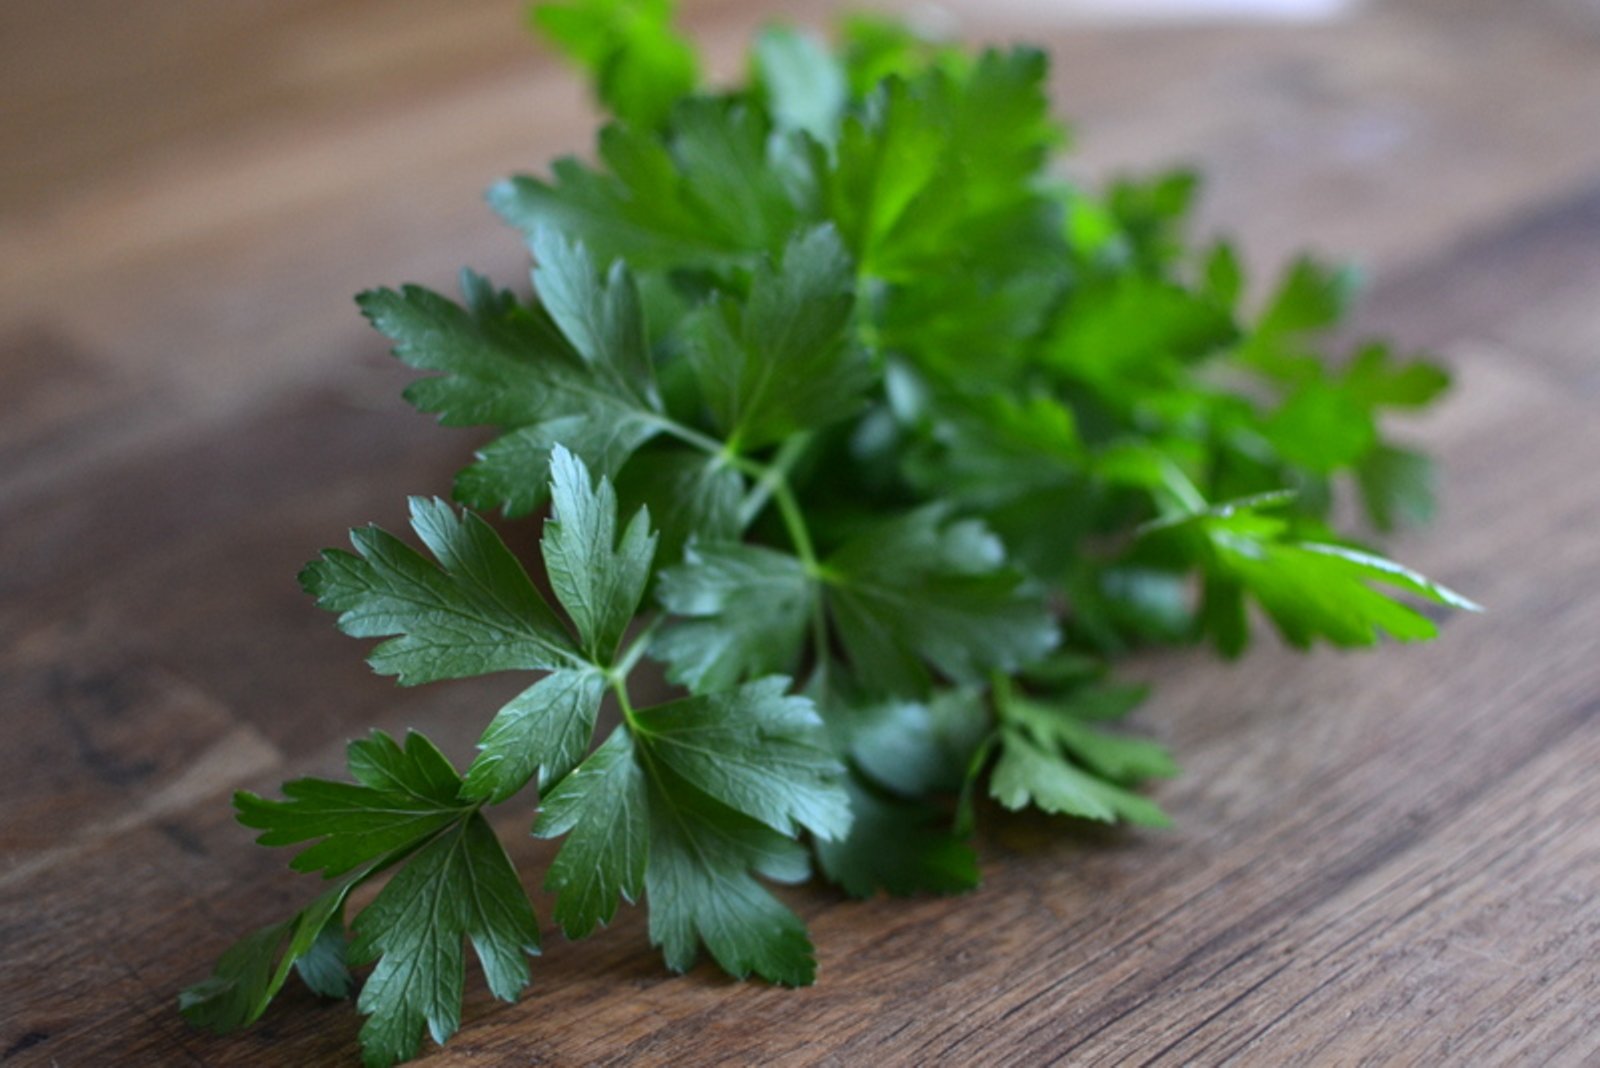
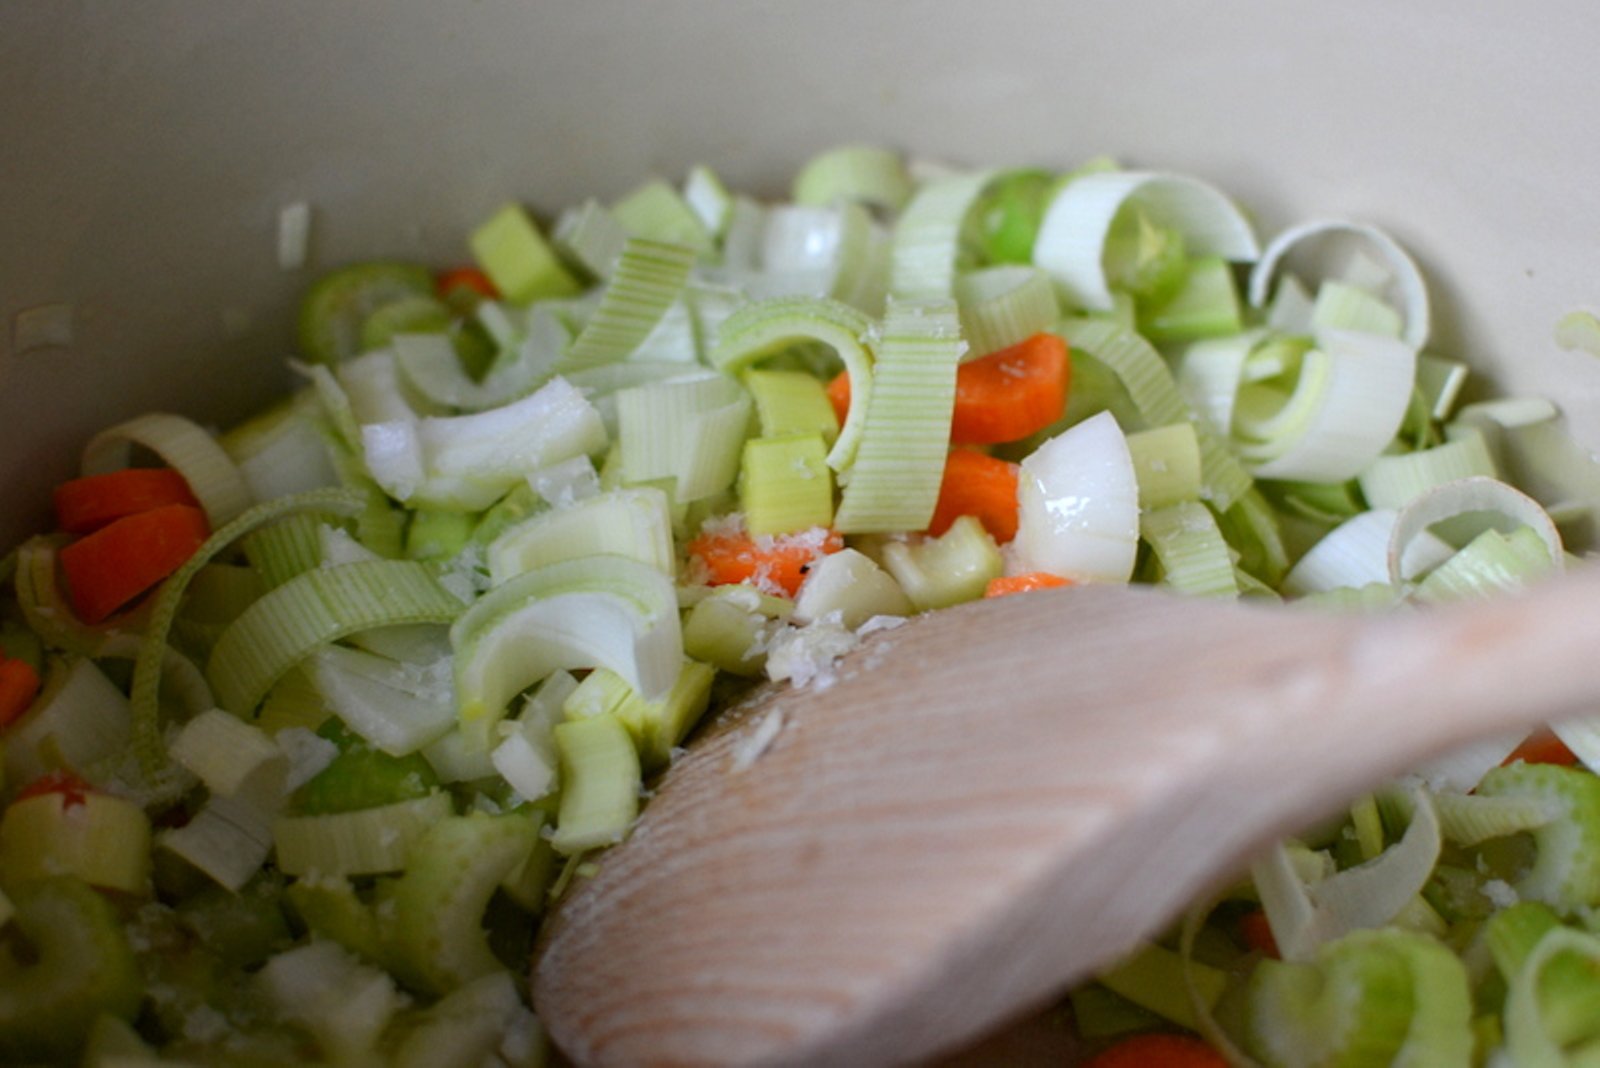
Cook up a simple tomato sauce. Chop 1 onion, 2-3 cloves of garlic and fry for a few minutes on hot oil until the onion is translucent. Pour in two cans of good Italian canned tomatoes and season to taste with salt and pepper. Then add 2 tablespoons of tomato puree and 2-3 tablespoons of finely chopped parsley. Sometimes you need to add a pinch of sugar/syrup or even ketchup (I said it) if the tomatoes are sour. Allow it to reach a boil, turn down the heat and leave it on a lazy simmer.

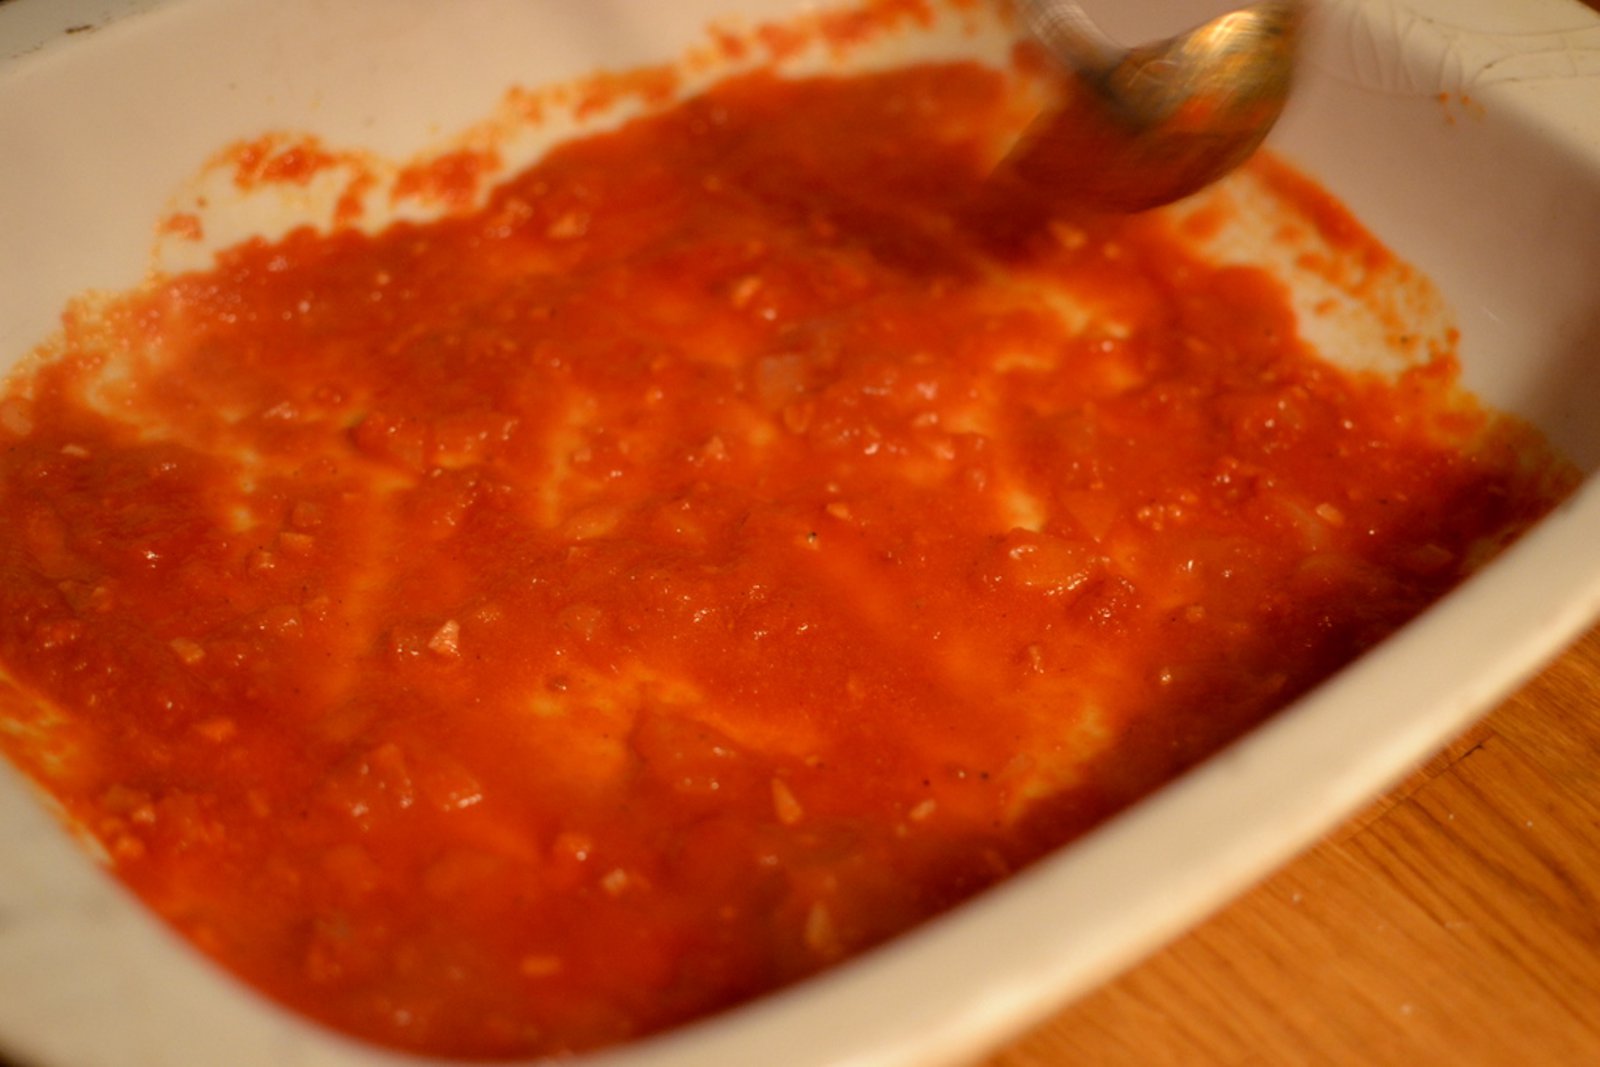
Homemade tomatosauce is always a treat

Next slice down two balls of mozzarella cheese as thinly as possible. Then you grate as much parmesan cheese as your budget allows - maybe 100-150 grams (what does this say about my economic status?). Nothing remains but to assemble the dish together in an ovenproof dish. First pour tomato sauce into the bottom, then slices of eggplant, next mozzarella/parmesan, and finally crown it with a few scattered leaves of fresh basil. Repeat the same steps for the next layer until none of the ingredients remain.

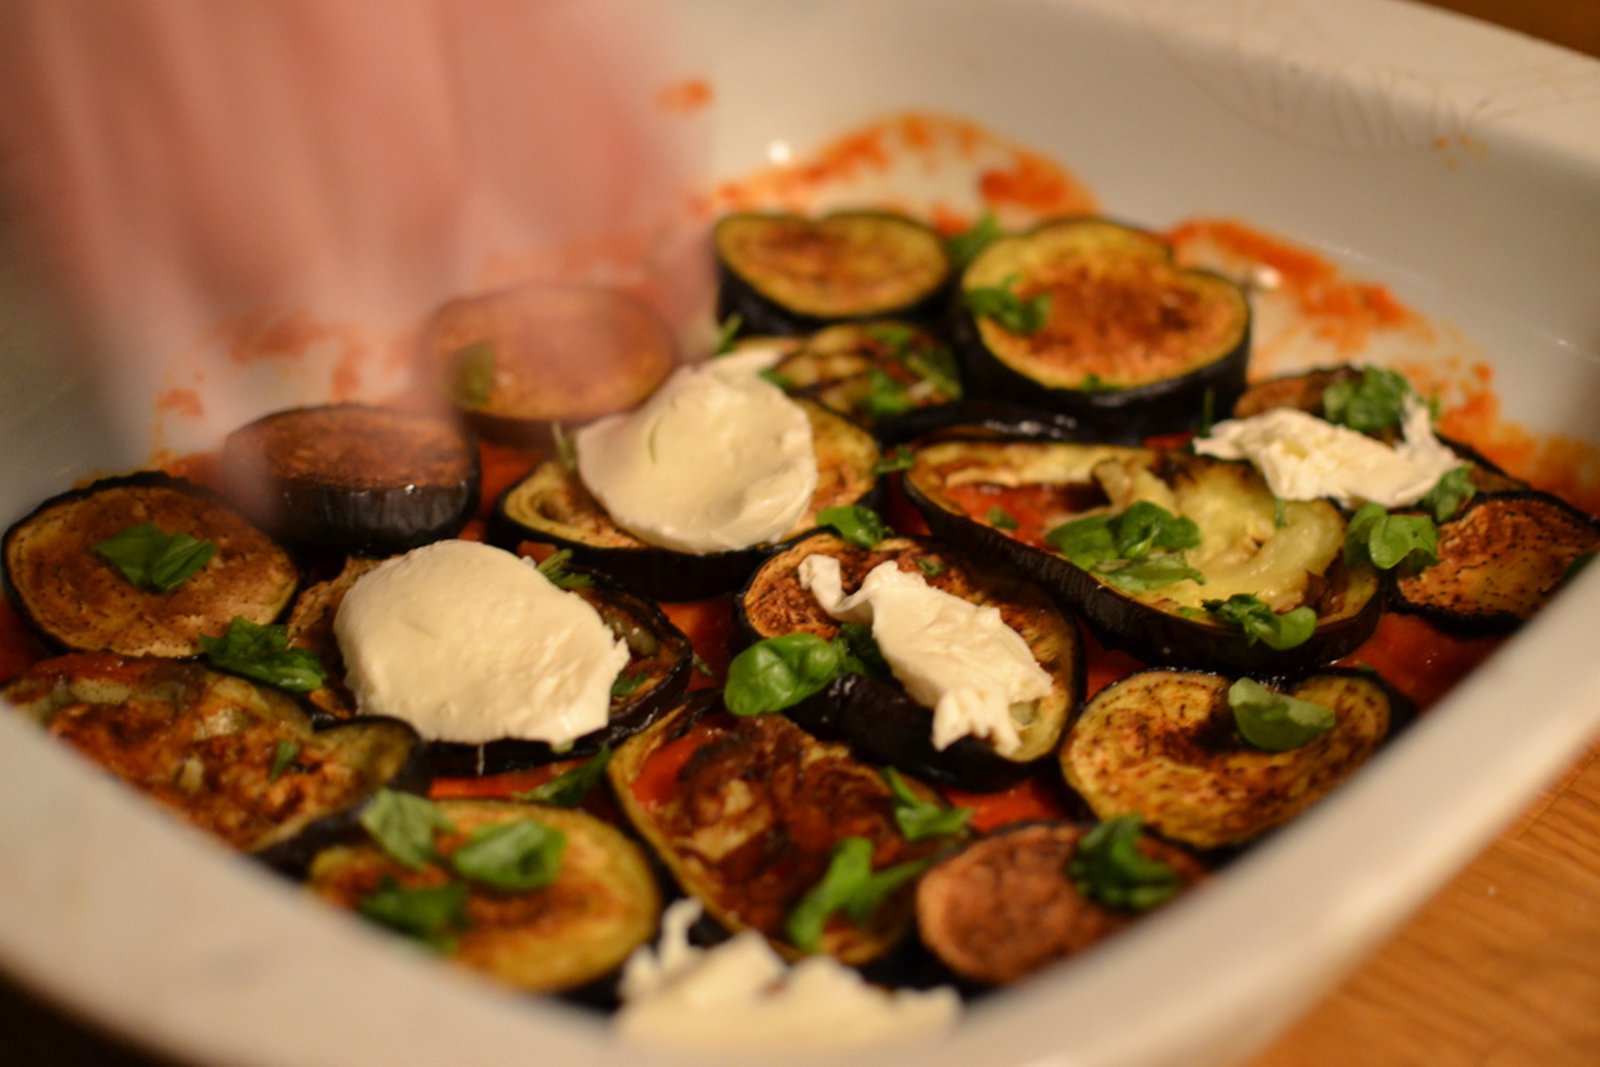
The ingredients are added in layers

As the finishing move, we distributed a mixture of breadcrumbs and cheese on top. Handful of breadcrumbs and handful of parmesan cheese are stirred together in a bowl and moistened with 2-3 tablespoons of good olive oil.

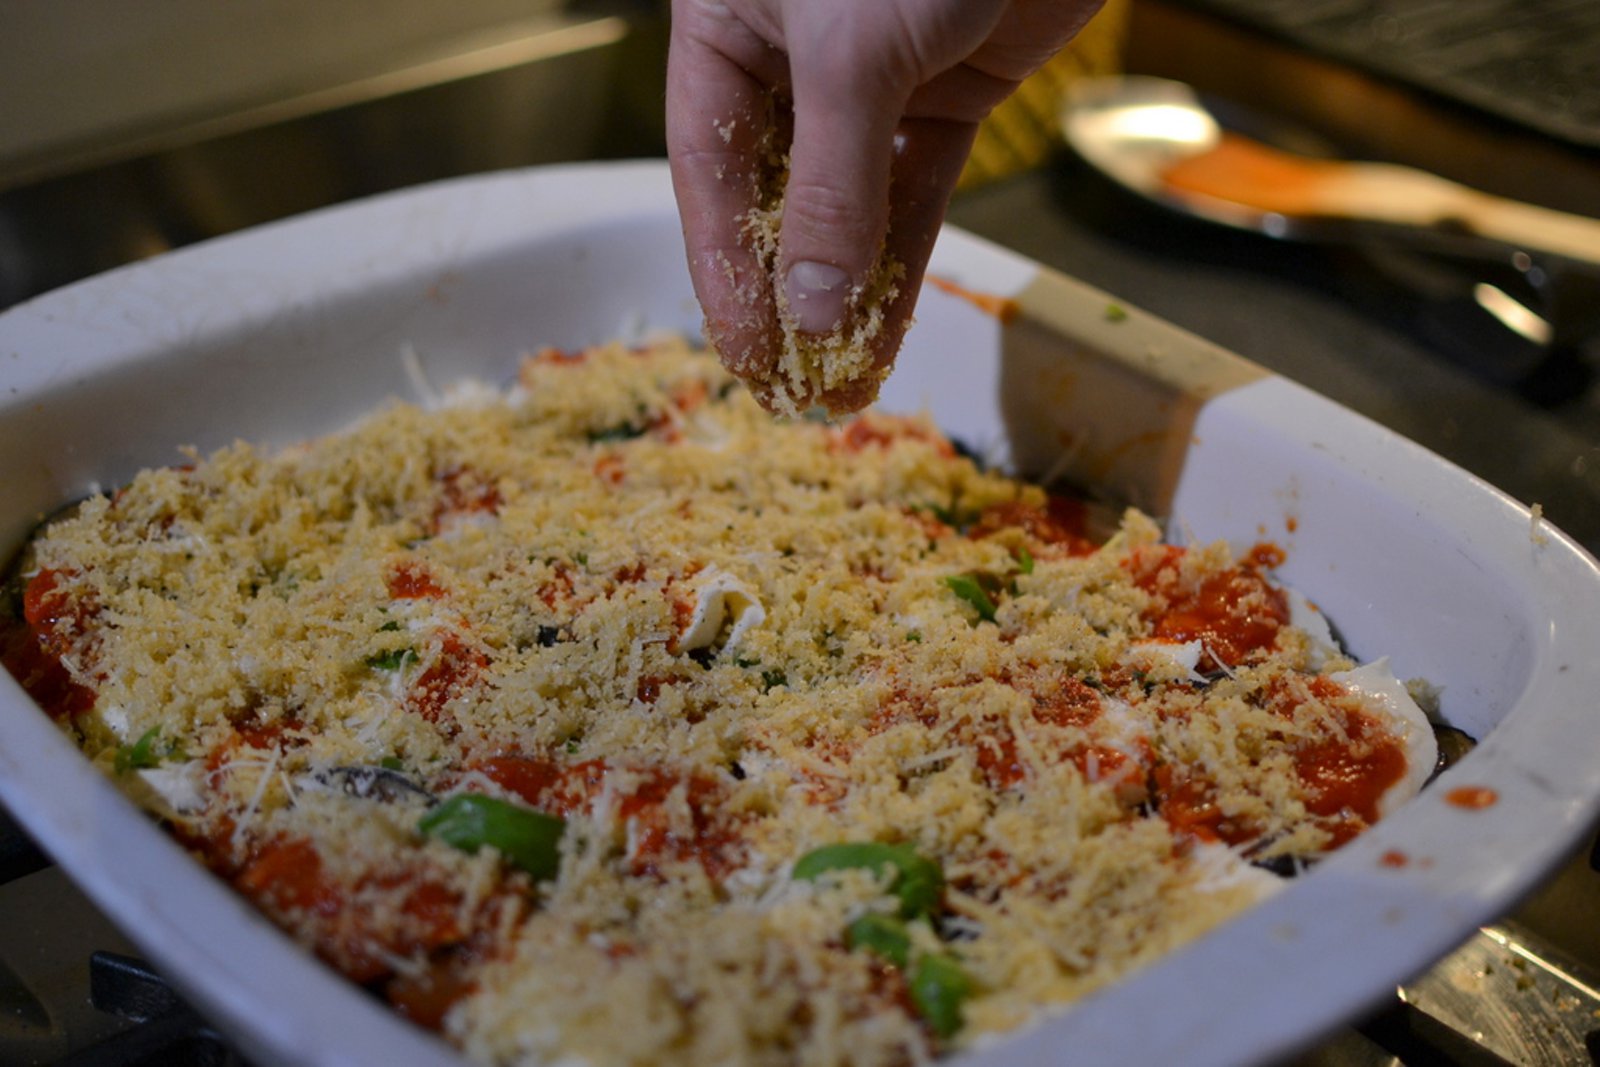
The crumbs are spread evenly

The crumbly mix is then sprinkled over the dish which is then transferred into a pre-heated over and baked for 30-40 minutes until the tomato sauce is bubbling and the top layer is golden brown and crunchy.

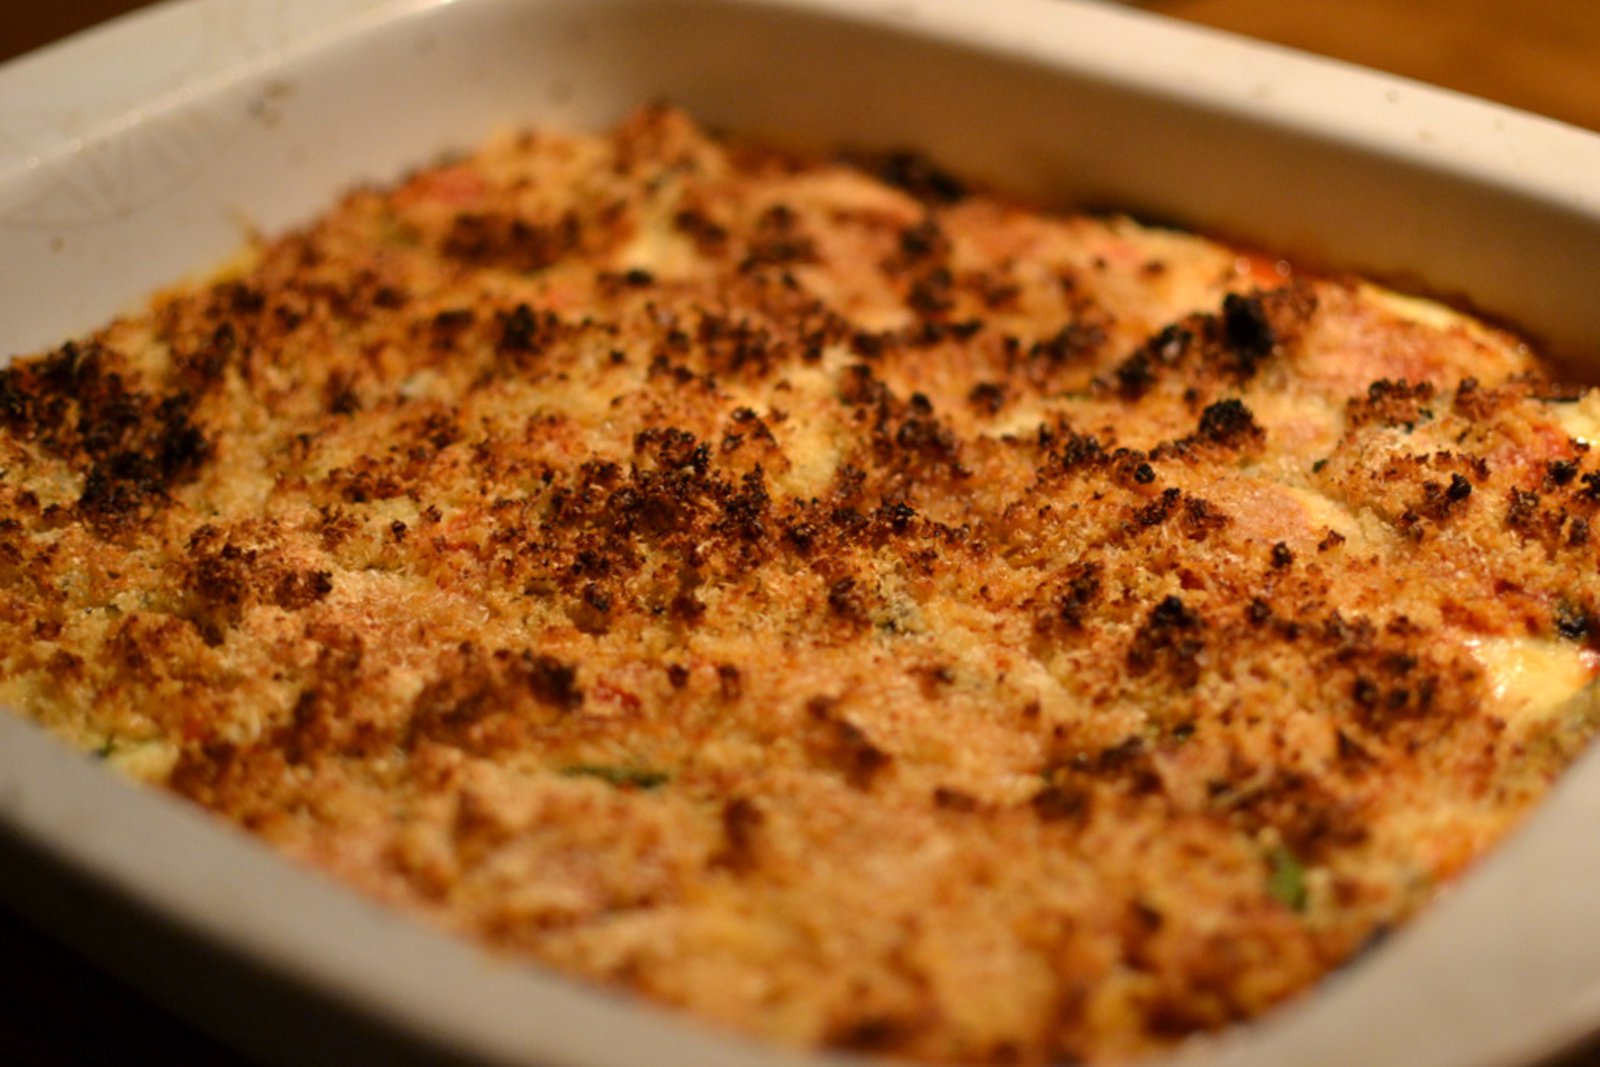
The Parmigiano cheese/breadcrumbs crispen up during the cooking

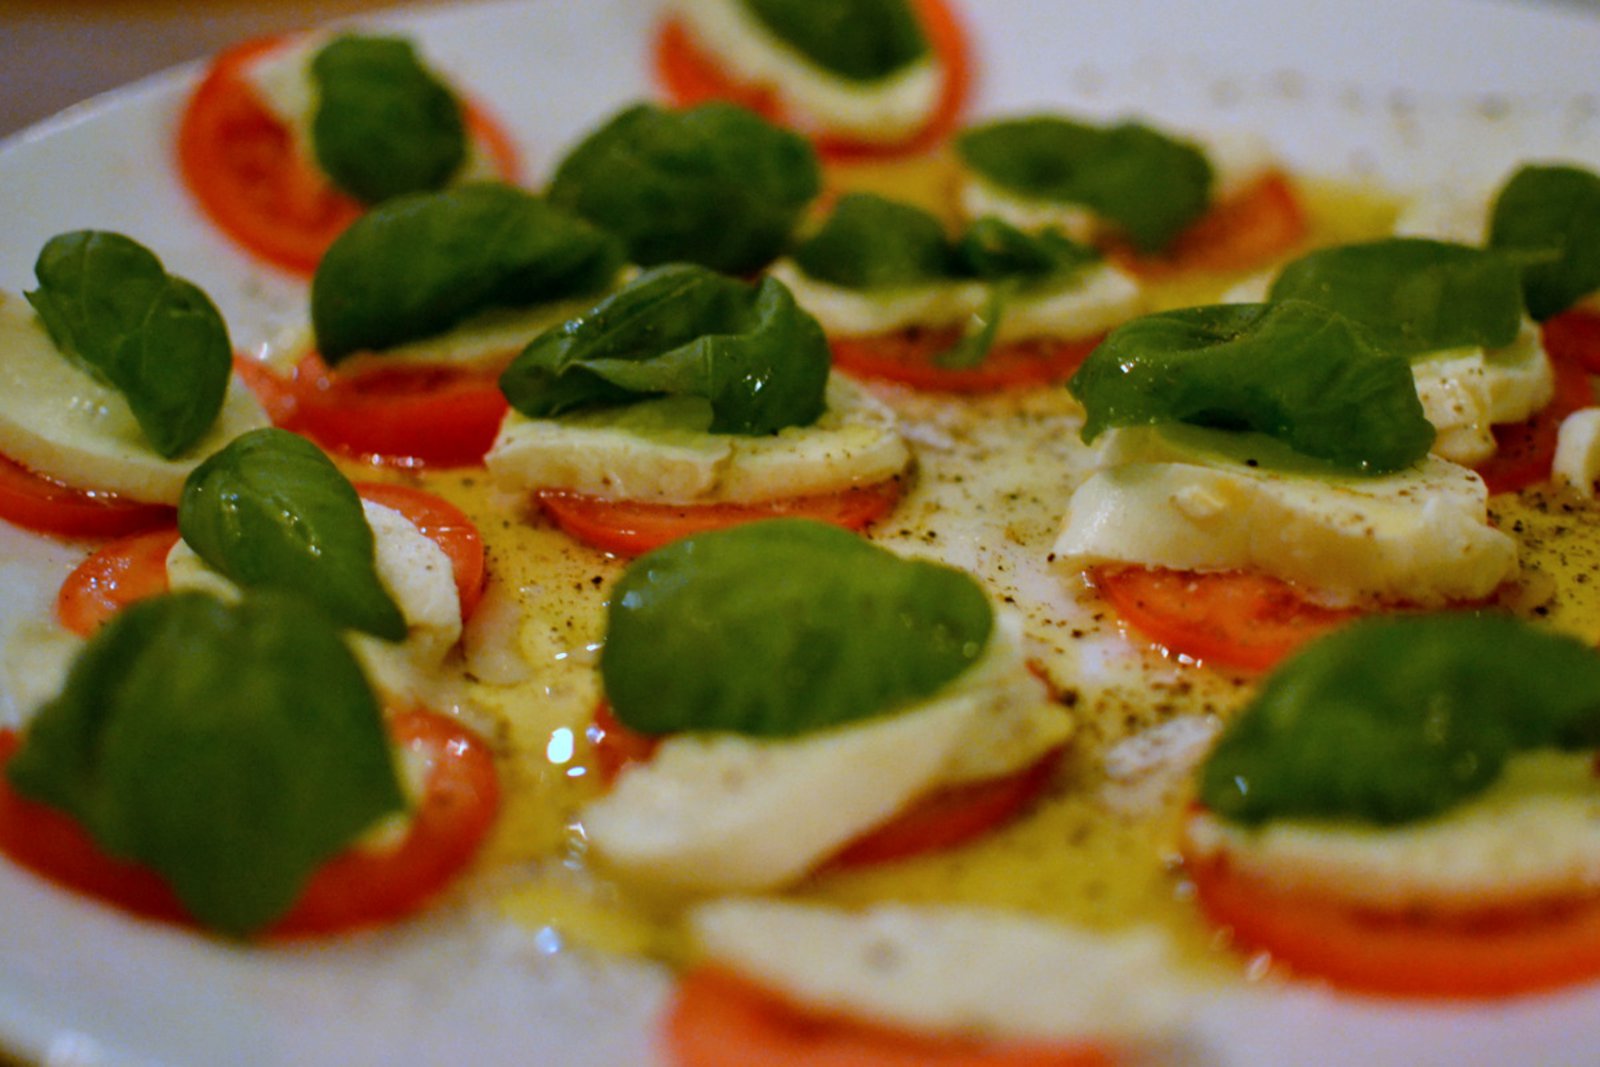
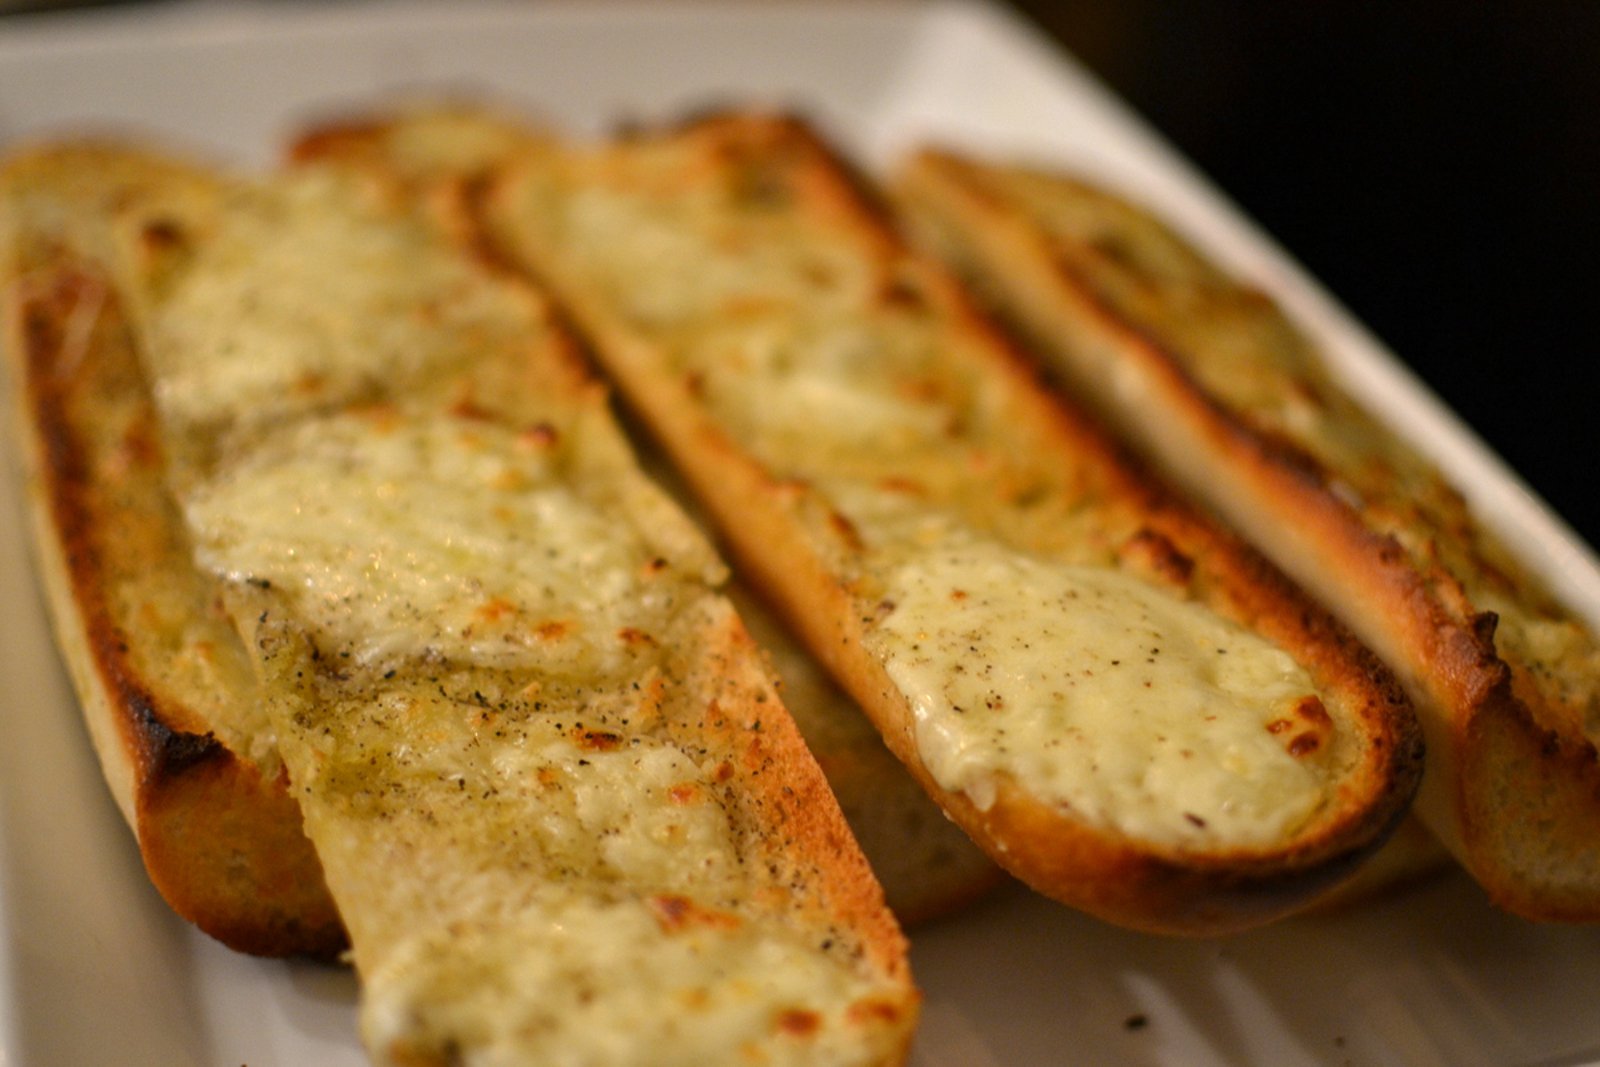
Served with garlic bread - we bought a baguette from the store which we halved and richly brushed with garlic oil along with a sprinkle of salt and pepper, and baked in the oven for 10-15 minutes until it had taken a golden color. We also had a lovely salad using a few types of lettuce from my vegetable garden which was tossed in a simple lemon vinaigrette.

Served with a glass of wine

We drank a very nice wine with the meal, which we have had a few times before. Maybe I should have served an Italian wine with the food but this one actually made a lovely accompaniment. The wine is from Argentine - close to the Andes mountains as the name implies: Terrazas de los Andes Malbec Reserva, from 2008. The wine is dark in the glass. Considerable fruit and spicy aroma which appears in the flavor as well. Good aftertaste - earthy and long-lasting.

Dinner is ready: pungent Melanzane alla Parmigiana

Bon appetit!

27 Mar 2012

Potent Icelandic/Italian Meat Sauce with Penne Pasta, Garlic Bread and Insalata Tricolore


My kitchen in full swing


I have favored this type of cooking for a long time. Recently, I also made a similar recipe originating in France,  Beuf au cocotte, which I promise to share with you at another time. As I have claimed many times before, this is real food, "old school" cooking with simple but quality ingredients. By allotting cooking its due time most food can be made into a delicious treat - a sublime treat even! Not that one requires any particular  methodology in order to make Icelandic lamb tasty - far from it - but this recipe summons the very best from the Icelandic lamb: tenderness, texture, taste, aftertaste. And in good company everything is made so much better!

lamb and some savory rosemary

Like I have mentioned above, the only thing this recipe in effect requires is time! You shouldn't attempt to cook this in a shorter time than three hours - but it does not really ask for much attention - it essentially cooks itself. It should be noted that this version of the recipe was cooked for roughly twenty people. 

Some aromatic vegetables; onions, carrots, cellery & garlic

Roughly 4 kilos of lamb, mostly chops but also bits of shoulder, are washed and dried thoroughly. Generously seasoned with salt and pepper and then set aside for a moment while the vegetables are prepared and fried. Chop two whole bulbs of garlic along with 4-5 rather large onions - red or white - it doesn't really matter. Peel 3-4 carrots and slice them into small pieces, and the same for a few sticks of celery. A large pot is placed on the hobs and the veggies are fried in plenty of oil - it is probably unnecessary to use a delicate oil like extra virgin olive oil for this kind of frying - many chefs hold that extra virgin oil loses it's specific flavor through frying and it is therefore pointless to waste such good oil - I normally use whatever is at hand! Whatever the case, make sure not to brown the vegetables. 

Brown the lamb

When the onion is translucent add the meat and brown on all sides. Introduce the meat into the pot in modest portions, because if the pot becomes too crowded, the meat will boil rather than fry. And we most certainly want it browned. Season in between. Transfer the browned meat to a plate while you fry the remainder - and make sure to save all those lovely juices - nothing should go to waste! When all this browning is done I pour a whole bottle of red wine over the vegetables - boil the alcohol away and allow the meat back into the pot to join their veggie comrades for a good simmer. To this I added 5 cans of quality canned tomatoes and the same amount of water and also 2 cans of tomato puree. When the liquid is poured in, it is important make sure that the meat and vegetables do not stick to the bottom of the pot, which they have a tendency to do at this point. Again, season well. 

Use good quality tomatoes

If you insist on spicing things up at this point in the process, use herbs that can handle longer cooking like bay leaves and rosemary. I made a bouquet garni using rosemary, bay leaves, thyme and marjoram.   

Prepare a bouqe garni - an ensamble of herbs

Allow it to reach a good boil, and then turn the meat sauce to a low simmer for around 2-3 hours with the lid on - this time I placed the pot into the oven, at 180 degrees. The pot is placed back on the hobs for the remaining hour, where the meat sauce is allowed to bubble and simmer gently. This needs to be reduced by at least a third up to half. It is easy to tell when the meat is ready - it will almost naturally crumble at touch and fall off the bones. Taste and see if the sauce calls for more stock - for example, if the bones on the meat were limited you might need to add some stock - but most of the time you won't have to! This time round, nothing needed to be done except for rigorous seasoning of course!

Simmer a whole day

When the dish is getting close to ready it is high time to add herbs that withstand less cooking, such as basil and parsley. Chop the herbs and stir into the sauce. At this point it is good rule to taste the sauce to see if flavors need to be corrected or balanced. Sometimes the canned tomatoes can be a little sour, and if that is the case you might have to add a pinch of sugar, or even a blasphemous squirt of ketchup. Season well - always Maldon salt and freshly ground pepper. .

Italian meatsauce

Boil good penne pasta in richly salted water with a touch of oil. When the pasta is ready, toss it into a colander and drain off the water, and then quickly back into the pot, since you need to add 2-3 ladles of the sauce to the pasta while it is still hot. Stir well until the pasta has been transmitted with the lovely crimson color of the meat sauce. Allow it to rest for two to three minutes, the pasta will absorb the sauce, and will be infused with all that wonderful flavor.  

Insalata tricolore

The meat sauce is served with a fresh insalata tricolore which is of course a classic - this is a recipe that requires no introduction. It is always a joy to serve and I never grow tired of eating it. There is just something about the invigorating combination of fresh mozzarella, beautiful red tomatoes and those deep green basil leaves - which is n.b. one of my favorite herbs. Plenty of proper olive oil, a few twists of salt and pepper grinder, and everyone licks their chops! 

Garlic bread

We also made simple garlic bread. Cut a few baguettes in half, brushed with garlic oil and layered slices of mozzarella on top. Baked in the oven at 180 degrees until the cheese melts and the bread is golden.


We had some splendid wine with the food. Coto de Imaz Rioja Reserva 2004 from Spain. A surprisingly good bargain I think - a pungent Rioja wine; full bodied. Smell of vanilla and oak - the wine is apparently matured for some time in oak barrels. The flavor is rich, dense and full of fruit.

Bon appetit!

25 Mar 2012

North African Mesa-style Buffet; Lentils, Hummus, Onion Salad, Halloumi and Olive Flat-bread


lovely Moroccan patterns

This was truly a feast, and that on a weekday. And it took only about 50 minutes to conjure it all up, sincerely, I kid you not. It is simply a question of logistics, culinary logistics if you will. This type of food is particularly enjoyable - bringing together a few simple courses. As I have mentioned before on my blog (and I keep repeating - probably to keep myself motivated) we in this household made a pact to cook and eat more of healthy and tasty vegetable dishes. And in this way we minimize our meat consumption - and when we do purchase meat, we get the high quality and well treated produce!

I am very fond of North-African food. I am of course fond of food in general but lately I have increasingly sought inspiration from cookbooks and recipes originating from that part of the world. I recently added two new cookbooks to my collection, A Month in Marrakesh by Andy Harris and Whispers from a Lebanese Kitchen – A family’s Treasured Recipes eftir Nouha Taouk. Both of these are well made and beautiful to browse through.

What I find so compelling about the cooking from this region is the spices that are used. This is precisely what makes the food so different from what one is used to in European cooking. There is something about grinding a bit of cumin in a mortel, toasting it briefly on a pan to awaken that thick aroma, and then drawing a deep breath, which delivers you on lightening speed straight to the Middle East of the mind (yes ... it was only cumin, I am aware of that!).

North African Mesa-style Buffet; Lentils, Hummus, Onion Salad, Halloumi and Olive Flat-bread

I began by making the bread. I just used my standard recipe - if you can even call it a recipe - it is more akin to an intuitive feeling for proportions. But let's try to get those proportions properly metric - the first thing I always do is awaken yeast in 300 ml lukewarm water leave to rest for about 5-10 minutes, and add a spoonful of sugar so the yeast has something to work with. Pour 500-600 grams of flour into a bowl, salt and 2-3 tablespoons of oil. Carefully add the yeast while stirring continuously. Knead the dough for 10 minutes (10 minutes is a good rule - just enough for all the ingredients to intermingle and fuse), and allow it to rise for at least 20 minutes. The bread is then brushed with oil, seasoned with salt and pepper, and then decorated with kalamata olives and a few caraway seeds. Baked in a pre-heated oven for 15 minutes. 

While the dough was rising it is time to take care of other matters. Sliced two tomatoes and one red onion very thinly using a mandolin knife and distributed on a large plate. Drizzled some extra virgin olive oil and lemon juice over, seasoned, and decorated with a few leaves of fresh mint.

Flatbread & tomato/onion salad

I also made hummus. I used chic peas from a can which I drained and rinsed in water. Poured into a food processor along with 1-2 crushed cloves of garlic and blended. Added a pinch of salt and pepper, one tablespoon of tahini, juice from one lemon and 2-4 tablespoons of oil (or just according to taste). Before serving, I sprinkled a pinch of paprika spice on top.

Then I grilled halloumi on a smoking hot griddle and decorated with fresh parsley once done. 

Humble hummus and grilled haloumi

Boiled 400 gr of Puy lentils in salted water for 20 minutes. Sliced two carrots, one white onion, two sticks of celery and 3-4 gloves of garlic and fried over medium heat for 5 minutes until soft and shimmery. I added to the pan a teaspoon of ground cumin, turmeric, coriander and paprika and fried for a few moments with the vegetables. Cut half a butternut squash into dices and fried with the rest. The mixture was calling for a bit of liquid, so I poured in a bit of water, allowed a cube of vegetable stock to join, and boiled. Then I added the lentils, seasoned well with salt and pepper and cooked until the liquid had evaporated. Check for taste, and this time I squeezed a little bit of lemon juice over. For the finishing touch, I sprinkled the dish with chopped fresh parsley!

Puy Lentils & butternut squash

Bon appetit!

22 Mar 2012

Rotisserie-style Chicken with Country Fries, Mushroom Sauce and Fresh Tricolore Salad


Homemade Pollos Asados

When I was young, I remember on Sunday evenings we frequently cooked a whole roasted chicken much to the delight of all the members of the family. My mother had the pleasant habit of enveloping the chicken with potatoes and other root vegetables, rub the chicken rigorously with oil and spices and roast until the skin became crispy and golden. With this dish she often served a creamy mushroom sauce - which was absolutely lovely. And I have routinely repeated my mother's recipe in one way or the other, and even disclosed the results on my blog.

When I traveled to Spain for the first time I saw how the locals cooked their chicken at these rather humble resturants that specialised in grilling the birds - pollos asados! There were special places which sold only roasted chicken skewered on a spit. I remember the when I took the first bite, it was unbelievable how juicy the chicken was, and the skin crackling and crispy - almost like soft biscuits and the meat completely tender. I lingered for a few moment in the restaurant and observed them cooking, and how they collected the fat/juices that dripped off the chicken into a trey att the bottom and then they repeatedly basted the chicken with the liquid. Holy moly ... how tasty I thought that food was - and still do!

Pollos Asados

After I gained possession of a proper oven for the first time I have from time to time cooked this kind of chicken. This is of course, by any measure, the perfect comfort food. This time I thought that instead of serving the chicken solely with the broth produced through the cooking, I would try to create something which resembled my mother's sauce. Low and behold, I think I succeeded!

Rotisserie-style Chicken with Country Fries, Mushroom Sauce and Fresh Tricolore Salad

The skewered chicken

This was in no way complex cooking. I say this often, but it specifically applies this time! I think the most complicated element of the procedure is getting the chicken on the skewer and then fasten it securely enough so it will properly rotate under the grill.

First I took a pinch of butter, maybe 30 gr, and placed in a pot with a similar amount of extra virgin olive oil. Heated until the butter is melted, which is then used to brush the whole chicken carefully so the entire surface is covered in a little fat. After this the chicken was thoroughly but simply spiced; plenty of salt and pepper, and a whole lot of paprika. Nothing remains but to stick the chicken into a piping hot oven and the grill turned to full blast. It is always a bit difficult to tell how long the chicken needs to be cooked since it is determined by the weight. So the best option is to use a thermometer and make sure the core temperature reaches 84 degrees - and then all is well. I poured around a liter of water, infused with a little stock, into the cooking trey below the chicken to ensure I would gather all the juices running off, both for basting and then of course also to use for the sauce.

Roasting away in the warm oven

The sauce was made in the following manner: I cut 15 mushrooms into slices, which were fried in oil/butter on a low temperature until beautifully golden. Put them to the side until the chicken is done and ready to be served. Carefully pour the broth from the chicken into the pan (800 ml), season, add 200 ml of cream and a dash of corn starch to thicken the sauce. Allow it to reach a boil and then simmer on low heat until the taste of the corn starch has evaporated.


Potatoes
My brother took care of the fries as so often before. This time he tried to emulate country fries, by allowing the skin to remain. The fries were prepared and cooked as they should be: double-fried. First deep fried on a lower temperature for about 4-6 mintues, and then removed from the pot and allowed to cool down on some paper towels. Once they have cooled, re-introduce them to the oil, this time at around 180 degrees, and fry until golden brown and crunchy. Don't forget to salt!

Tricolore salad


With the food we served this lovely salad, which is in effect nothing other than the Italian salado tricolore slightly transformed. Tricolore is the classic dish where you layer ripe sliced tomatoes with slices of mozzarella and a few leaves of basil in between layers. I did the same except that I served the tricolore on a bed of green leaves and scattered some thinly sliced red onion over the top. Of course I drizzled a bit of olive oil over the whole thing as well, accompanied with fresh lemon juice and salt and pepper.


With the food we drank very good red wine. Coto Vintage Crianza from 2006. This wine I have had before - but was even more pleased with it this time. It was a lovely accompaniment to the pollos asados! The wine is from Spain and is made from Tempranillo grapes. It is allowed to mature in oak barrels for 12 months, and then in the bottles for 2 years before it is put on the market. The wine is dark in the glass, spicy and tastes of dark fruit and cherries. Soft flavor of oak with a warm after taste. Tasty wine!


Let's feast


Bon appetit!

20 Mar 2012

Homemade Gnocchi di Patate with Homemade Basil Pesto


Valdís makes gnocchi


It has been a while since I made gnocchi - probably sometime in autumn 2007 if I remember correctly. Back then I made it in the same way as I did now, with the difference that before I served the gnocchi with a simple but delicious tomato sauce. This time the accompaniment was a lovely, deep green homemade pesto. I was first acquainted with this dish when I was travelling through the Piemonte region in northern Italy around 12 years ago. There gnocchi is a common dish and frequently seen on menus. It was by complete chance that I ordered it - I assumed I had ordered the pasta that goes by the same name, but instead I was served a bowl full of strange little balls covered in sauce. The texture of gnocchi is rather different from regular pasta - soft and doughy and in my opinion - very tasty.

Cooked balls of dough, or dumplings, are of course nothing new. They have been produced in one form or the other in most countries for over 2000 years. Potato-pasta is on the other hand a slightly younger creation and was first made in the sixteenth century after the Spaniards brought potatoes back to Europe with them from their conquests of South-America. As a consequence, this specific type of pasta was born - gnocchi di patate!


Homemade Gnocchi di Patate with Homemade Pesto


Homemade pesto
I made the simple and traditional potato-pasta this time, using potatoes and flour, but if you are feeling adventurous you can easily add for example ricotta cheese, sweet potatoes, spinach, herbs or whatever comes to mind. This is also the kind of food where you can get the kids involved in the preparation - my daughter Valdís had no problems joining us in the gnocchi-making!

Gnocchi di Patate

Boil one kilo of waxy potatoes in richly salted water. When they are boiled, pour away the water and peel and mash the potatoes. To the potatoes you add 2 eggs, 1 tablespoon of olive oil, a bit of maldon salt, freshly ground pepper, 2 tablespoons of grated parmesan cheese and finally 150 gr of flour (sometimes you need to add more flour to thicken the dough). Mix the ingredients well and then knead into a rather thick dough. Cut small balls from the dough and roll each one into a sausage, cut into bite size pieces and then carefully shape the gnocchi with a fork.

Put boiling salted water
Boil the potato-pasta in generously salted water, the pasta will at first sink to the bottom but when ready, it will stoically float to the surface. Then it is fished from the water preferably using a slotted spoon so the water will drain away.

Dressed with some fragrant pesto

Making pesto is child's play. You can almost use whatever green herbs or leaves you want and the same holds for the nuts. I have made pesto using basil, parsley, rocket, coriander, but also from a mix of this and that - I have even used rosemary and thyme - and all of these ingredients have produced a great tasting pesto. Using toasted pine nuts is also classic, but toasting them is not a rule edged in stone, plus you are free to use different kinds of nuts, for example walnuts or pecan nuts.


Although, this time I stuck to familiar paths and made the traditional pesto: leaves from three basil plants, handful of toasted pine nuts, 70-100 gr of shredded grana padano cheese, salt, pepper and then of course extra virgin olive oil. Combine everything in a food processor or a mortel and mash until you have reached the desired thickness.

With the food we had a nip of white wine from a bag in box, Drostdy-Hof Chardonnay. I frequently buy wine from this producer - and it is usually a good buy. It is a wine from South-Africa and is quite good for a bag in box wine - mild yellow color, fruity and rather dry. Ice cold and refreshing.


Ready for the palate

Bon appetit!

16 Mar 2012

Potent and Savory Petit Pois Soup with Homemade Wholewheat Bread


Lovely parsley

I can't get enough of underscoring the importance of vegetables, despite my obvious and arguably sinful attraction to meat! But, in the next few months more vegetables dishes will adorn my tables than before, not that I am giving up on meat, on the contrary. It is always fun to try something new, but it is not only a desire for the new that drives my interest in vegetables. There are at least two reasons - the first can be traced to Michael Pollan, who has written an host of books on the food culture of the West (or the lack of culture to be more precise) and his conclusion is the deceptively simple proposition: "eat food, not too much. Mostly plants." For this assertion are endless arguments and instead of reiterating them here I will rather suggest you pick up his books, for example, Omnivore's Dilemma. Another strong influence on my new emphasis on veggies is one of my favorite TV chefs and cook book authors, Hugh Fearnley Whittingstall, who recently published the book River Cottage Veg Every Day! (complimented by a TV series) devoted only to vegetable recipes, and where he writes on the environmental impact and ethical implications of our modern food culture.

My personal conclusion after all this reading is to eat more vegetables and then eat proper quality, even organically grown meat from humanely treated animals. This type of meat is of course more expensive but the fact that vegetables are rather cheap here in the south of Scania weighs against it. This an agricultural region after all! But the basic idea is this: meat-free Mondays, fish on Tuesdays, a nice vegetable soup once a week with homemade bread - then on the weekends the meat dishes will reign supreme! Let's see how consistently we will follow this trajectory - there is at least no harm in trying, is there?

Potent and Savory Petit Pois Soup with Homemade Wholewheat Bread


Leeks, carrots, onions and cellery on mild heat


A soup like this is tasty, refreshing and healthy. It is quite simple to boot (don't I always say this?). First of all I began by chopping a whole, white onion, few carrots, 2-3 sticks of celery, few cloves of garlic and then a whole leek. Fried the vegetables in olive oil on low heat for around 10 minutes, remember to season well. Poured in 2 liters of water, increased the heat under the pot, put the lid on and boiled for 45 minutes (in the meantime I prepared the bread - more on that below). Through this procedure you will have produced a wonderful and pungent vegetable stock! Season to taste.  

Petit pois poured into the stock

Next I added 600 gr of frozen green peas (petit pois), fresh parsley, and then a few mint leaves and boiled for another 20 minutes. I then pureed the whole lot into a beautifully green soup. Now you have to taste to see if it needs balancing, salt and pepper - I added 50 ml of cream to even the flavor of the leek which had brought with it a slightly bitter taste. Other than that nothing else really needed to be done.

The ready soup

Nothing remains but to prepare and bake a homemade loaf of bread! 

First I awakened 25 gr of yest in 600 ml of luke warm sugared water (30 gr of sugar) and allowed it to rest and infuse for 10 minutes, or until a nice cushion of froth has appeared on the surface.

Yeast

Then it's time to tackle the bread dough (I lie - I had pretty much taken care of this before). Mixed together 500 gr of Graham flour, 250 gr of wholewheat flour and 250 gr of plain white flour in a bowl and added maybe 30 gr of salt and 3 tablespoons of oil. 

Making bread

I added the liquid carefully and gradually while the dough twirled around in the mixer. Sometimes you have to add flour/water depending on the texture and consistency of the dough. When the dough is beautiful, soft and elastic and if it slightly springs back from touch and doesn't stick to your fingers, then nothing further needs to be added. Just knead rigorously for 10 minutes and set the dough, covered with a tea towel or a damp cloth, in a warm, draft-free place and let it rest for 1-2 hours or until it has doubled in size. 

The bread has taken off

When it has doubled, press down on the dough to release the air, and transfer to a baking pan where the dough is formed into the shape of choice. I cut parallel incisions along the surface, then in opposite angles, for a nice diamond pattern - but this is not purely aesthetic, it also serves a practical aim since the dough will rise again, and even more so in the oven - and in this way it will retain its shape. Allow the bread dough to rise for roughly half an hour, it is then ready to be baked in the oven at 180 degrees for up to 40 minutes. 

Before and after baking

Served with butter, various kinds of cheeses, and a simple salad. Scrumptious!

Bon appetit!

13 Mar 2012

I Love Chanterelles; Tagliatelle with Chanterelles and Truffles Served with a Sourdough Baguette – and a Few Other Recipes!


The lovely autumn pickings

In late summer and early autumn I venture on a mushroom hunt, 'the quiet hunt' as mushroom connaseur Antonio Carluccio likes to call it. This is a habit I have acquired in the recent years after moving to Sweden. Last autumn was no exception, in fact, I have never picked such a generous bounty of mushrooms ever before. First I went hunting by myself - I drove into the countryside and headed into the woods outside Dalby, which is a village close to Lund, and walked a circle without though coming across anything edible. After this I decided on a different tactic, I drove into some random direction and stopped the car as soon as I set eyes on a familiar mushroom. Low and behold, soon enough I had found four large boletus badius mushrooms, which are good edible mushrooms, closely related to the famous Cep.


 Shortly after my daughter and I went on a little walk along the road somewhere close to the center of Scania - this will not be discussed in more detail since no diligent mushroom hunter discloses the locations of his treasures! We were quite lucky, found a number of chanterelles and various kinds of boletales mushrooms. We returned to the same place - and we sure hit the jackpot! Both times we caught a whole bunch of chanterelles and some more boletales (which are all edible): cep, boletus badius, velvet bolete, orange birch bolete, and then a few bitter boletus felleus or tylopilus felleus (which all ended in the bin). This was amazing, half a day went into hunting and gathering, and then the following days were spent enjoying the fruits of that labour. I have been leafing through a few books on mushrooms - and added a new one to the collection recently - The New Mushroom book (in Swedish), which appears to be rather comprehensive.

You have to be careful when picking mushrooms, for some of them are poisonous and even lethal. Learn from others, read books and take them with you to the field. Before eating,  drying and storing - identify all the mushroom. Don't pick mushrooms you don't know is a good rule to live by!


A floral arrangement of chantarelles

Unfortunately we became the victims of ticks - I was bitten thrice and my father was bitten at least ten times. I have to admit that it is kind of frightening to pull those wriggling ticks of your body. Then you have to be careful to scrutinise the bites a few days after. If an inflammation appears you need to consult a doctor - but it is not dangerous if you get them off in time. Don't let minor details like this discourage you from the mushroom hunt - it is well worth it!

I Love Chanterelles; Tagliatelle with Chanterelles and Truffles Served with a Sourdough Baguette – and a Few Other Recipes!


More of the lovely chantarelles
The recipes are of the simple kind - but they are definitely not worse for it. Most of the time simple food is better, but then the produce and ingredients are of utmost importance. The produce has to be new, fresh and tasty - if this is taken care of, failure is close to impossible. 


A small but fragrant truffle

First I diced a small white onion along with 3 cloves of garlic. Poured oil on a pan and heated it slowly, and then fried the onion on low temperature until it was soft and even close to sweet (takes around 15 minutes on low temperature). 


Frying chantarelles
Then I cut down the mushrooms and fried them for a few minutes until softened and shiny. To this I added half a truffle which had been sliced very thinly. 


Light chicken stock

Next I poured 300 ml of chicken stock (made from cubes), seasoned with salt&pepper, and 70 ml of cream and reduced by around a half. Shredded 50 gr of good parma cheese and mixed with the sauce, both to thicken it and of course also for the flavor!

Ready on plate, with some crusty bread

I then boiled some tagliatelle according to the instructions on the pack in richly salted water and when the pasta had become "al dente" I poured off the water and added the hot pasta to the sauce. I decorated with parsley and served with a sour dough baguette.

When I look at the pictures I realise I should have shredded a bit of truffle over the dish in the end. I will do better next time - if that is even possible. This dish was simply delicious - chanterelles are truly a sublime thing, deep flavor, a taste of sweetness and apricots but still earthy - a tastier mushroom is hard to find! 


We had a nip of white wine with the food. Monte Ceriani Soave from 2006 which is an Italian white wine from the Veneto region, close to Venice. The wine is entirely made from Garganega grapes, which I think I was tasting for the first time. It is light yellow in the glass, condensed aroma, fruit. The taste is clear, rather dry but full of fruit and a trace of butter. The wine accompanied the meal perfectly!


Bon appetit!

The food was so good - it deserved a close up

P.S.

Following the great mushroom harvest I felt compelled to cook dishes where the chanterelle played the central role. Here are two:

Chantarelle au pain levain


Around a tablespoon of thinly sliced red onion and a clove of garlic are fried on a pan in a little splash of extra virgin olive oil until soft and translucent. Add the chanterelles and fry for about 5-7 minutes until done. The aroma that engulfs the kitchen at this point is divine. A slice of French levain bread, which is a famous type of sour dough bread, are brushed with oil and then grilled on a fiery hot griddle until the slice has taken on the characteristic black streaks on both sides. Nothing remains but to place the bread on a plate and pour the fried mushrooms over. Bon appetit!

Flammekuche au chantarelle


We also made a German pizza, flammekueche or tarte flambée (as it is called in the French side in the Alsace region). This dish is a variation of pizza which is well known on the border of Germany and France. You make a traditional pizza dough, flatten it out very thinly and smear on top a layer of good creme fraiche, and sprinkle a few strips of caramelised onion and of course - the star ingredient - chanterelles. Bake at 350 degrees on the BBQ for about 5 minutes until the bottom is crunchy! Bon appetit!

LinkWithin

Related Posts Plugin for WordPress, Blogger...